Check that the two-bomb state is available
This task begins after the demo has supplied the ability to have two body bombs available. It is not an opening-room requirement. If your current state only permits one placement, continue exploring rather than treating a two-bomb example as a test of faster clicking. The first-blast routine should already be familiar: place, separate the head, detonate and allow body recovery.
On a safe surface, confirm the state you actually have and observe which placed body responds to a trigger. Do this before a spike-side attempt. An outward-and-return plan depends on knowing what remains after the first action; it should not begin with an untested assumption about which of two objects will disappear. If the result is unclear, simplify the setup until you can follow both bodies and the head separately.
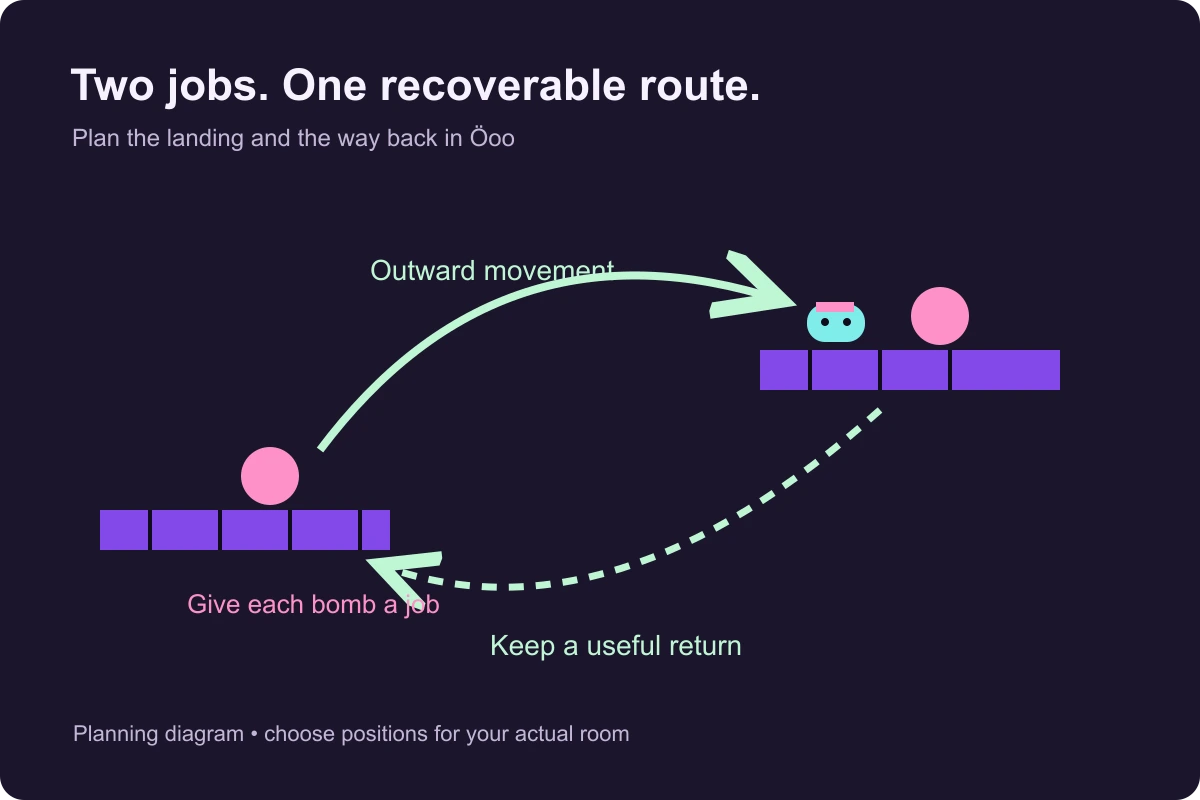
Choose the return position before the outward launch
Locate the place where the head should be safe after the crossing and the place from which it could come back. These may be different surfaces. A head that survives on a narrow lip can still be badly placed for another blast, especially if the useful remaining bomb is on the wrong side. Treat the landing as a new starting state, not just a finish line.
Trace the open space between those positions. Include the ceiling, a wall that can interrupt sideways travel and the spike floor below. Then ask where a remaining bomb would need to be relative to the head for the next useful displacement. If the plan requires the head to stand in solid terrain or above spikes without a surface, revise it before placing the first bomb.
- Name one safe landing for the outward movement.
- Identify a staging place for the return or next ascent.
- Check which body will still be useful after the first explosion.
- Allow for body recovery instead of assuming instant replacement in mid-flight.
Give the two placements different jobs
Assign the first displacement
Decide which blast should move the head out of the departure area. Use the relative-position rule already learned with one bomb: the head is pushed away from the explosion, so its side and height matter.
Reserve a useful second state
Place or preserve the other body where it has a job after that displacement. A second bomb beside the first is not automatically a return route; compare it with the head’s intended arrival.
Make one deliberate trigger
Watch the first blast and the head’s trajectory. Do not immediately issue a second detonation merely because the original plan contained two actions.
Recheck before the next action
Compare the actual head position with the remaining bomb and the receiving surface. Continue only when that relationship still supports the movement you want.
The distinction between intention and arrival is useful even in a short room. The first explosion can leave the head higher, lower or farther sideways than expected. A second action copied without that check may amplify the miss. Two bombs give you another prepared state to work with, but they also give you another state that can be spent before you are ready.
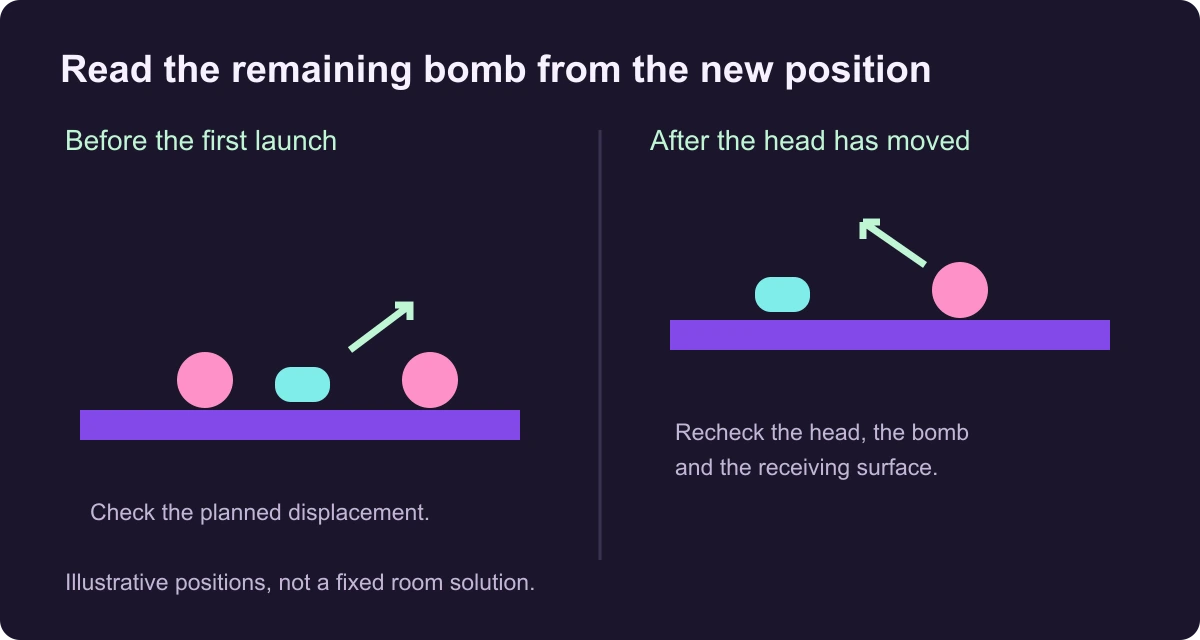
Judge the remaining bomb from the new head position
After the outward movement, stop thinking from the original departure point. The remaining bomb now has a direction relationship with the head’s new position. A placement that looked useful from the starting ledge may now send the head away from the return surface. Inspect the actual pair before triggering again, especially when the head has landed on a small ledge above a spike floor.
If the head is still moving, identify the moment at which the intended relationship will exist. If it has landed, check whether a small movement on that surface can make the next blast useful. Do not rely on placing a replacement body during the brief post-explosion recovery. A route that needs an unavailable body at exactly that moment is missing a stable stage, even if its first launch looked promising.
Temporary openings deserve the same caution. The early blue stack can move under a blast and settle back, so a return arrangement should not assume the space remains open forever. Decide whether the next action needs that opening while it exists or whether another safe approach is available after the objects settle.
A checkpoint shaft makes the recovery question visible
Show the room example (puzzle spoilers)
In a demo shaft with spikes across the bottom and a checkpoint ledge at the upper left, a successful sequence brings the head back to that upper ledge while body bombs occupy the setup space. The useful lesson is the relationship between the return surface and the remaining body, rather than a set of screen coordinates. A first displacement into the shaft is only half the task.
Before committing to a similar space, point out the upper ledge you intend to regain. Compare the head’s eventual side and height with the body that can still influence it. If the first blast leaves the head drifting below that useful relationship, a blind second trigger will not repair the plan automatically. Rebuild from the checkpoint with one changed placement or trigger moment, and look for a result that restores a controlled position.
Use the failure to choose one adjustment
| Outcome | Useful next adjustment |
|---|---|
| The outward launch is too low | Keep the destination and change the relative height or trigger moment. |
| The head travels past the intended landing | Revisit the sideways relationship instead of adding another blast immediately. |
| A remaining bomb points the return the wrong way | Plan its job from the expected new head position before leaving. |
| A second placement is unavailable after the first explosion | Add a stable recovery stage and allow the body to return. |
| A temporary opening closes before the return | Change the sequence or choose a route that does not require the opening to stay permanent. |
Keep the working portion of an attempt. If the outward crossing is reliable, focus on the return arrangement rather than changing both placements at once. If the landing itself is not dependable, solve that first and postpone the return trigger. A successful two-bomb plan is a sequence of understandable positions with a useful action left at each stage.
This guide does not require an old collision glitch, a secret passage or a commercial-release route. Use the room and abilities the browser demo currently gives you. When only the connection has failed, Retry Game addresses the player window; when the game is running and the setup is wrong, use its checkpoint recovery and rebuild the route deliberately. The question to answer is where the head can safely act next.